The symptom leading to this repair was that the Service Engine Soon light on my car would come on after driving some distance on the highway, and it would go away after driving some distance on local roads. The error code was P0128 -- "coolant temperature below thermostat regulating temperature."
This job is about $300 at the dealer (some people got a quote for $400). I decided to do it myself and got a thermostat and housing assembly for US$57.70.

Here is how I hooked up a scanner to check the error code. I'm told some shops would do this for free.

This is a closer look at the OBD-II connector, which is standard on all cars manufactured since 1996.

Following the instructions of the scanner, I got the error code P0128, "coolant temperature below thermostat regulating temperature." What it means is that the coolant temperature is too low. One logical reason is that the thermostat opens up too early before the coolant reaches its designed operating temperature. It's probably not stuck open in my case because the light would go away after driving on local roads.

To replace the thermostat, you'll need to drain the coolant, which requires opening the drain plug at the bottom of the radiator, which requires removing the splash guard at the bottom of the car, which requires jacking up the car and putting on stands, at least the front end.

After removing the plastic splash guard, you can see the blue drain plug at the bottom of the radiator.

Open the coolant filler cap at the top of the radiator, and open the bleeding valve with a screwdriver.

Place a pan under the radiator and open up the drain plug.

Drain the coolant.

This is the coolant drained.

There are 4 screws holding the thermostat in place. It is possible to remove the thermostat without removing anything from the radiator. You just need an extender of the right length (a short one) on the socket wrench. In my case, it was a 3/4"-to-1/2" adapter. You'll also need to cut the nylon tie-down of the wiring.

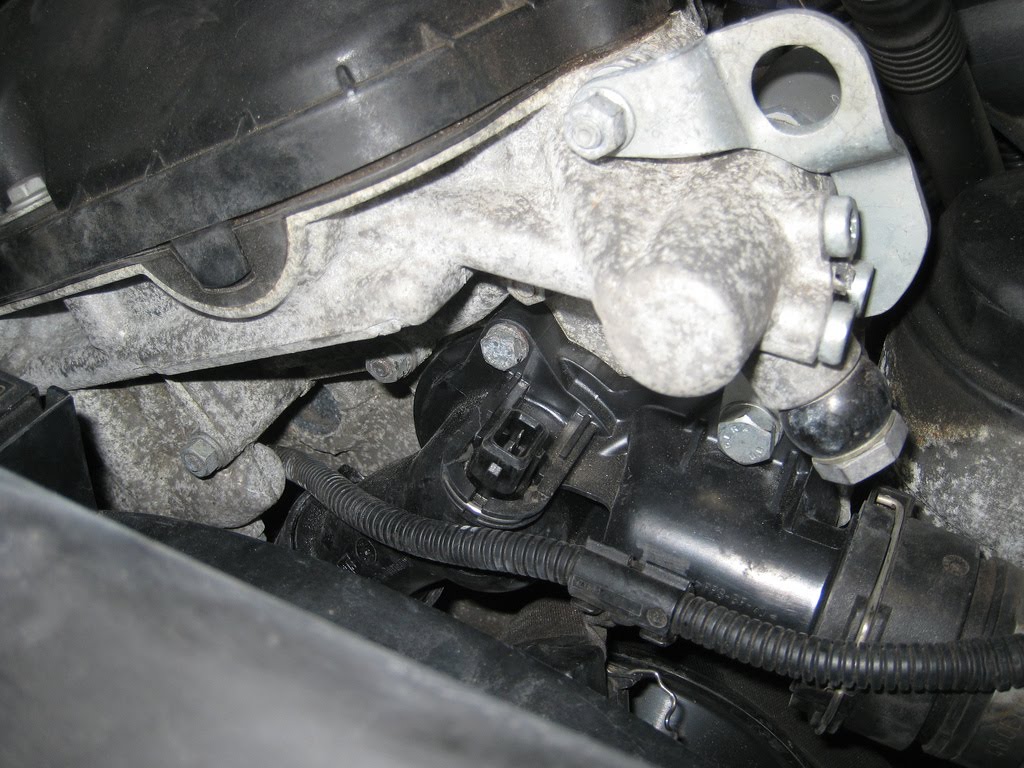
This engine lifting bracket needs to be removed because one of the screws holding the thermostat to the engine also holds this bracket.

There are two hoses connected to the thermostat. Each can be detached by sliding the metal clip and pulling on the hose. This is the upper hose which is easier to detach. The bottom one may require some effort due to lack of working space. Also disconnect the temperature sensor connector. After that, the thermostat is free from the engine. It requires some Tetris skills to take the thermostat out of that space between the engine and the radiator.

Here are the thermostats, old and new, side by side. It appears that my old thermostat is not stuck open. I believe it just opens too early but I didn't test it (by putting it in a pot and heating it up...).

The more difficult part of installing the new thermostat is the bottom hose. There is just not enough space to apply any kind of pressure to push it onto the thermostat. Here I applied a little Vaseline on the o-ring which made it a lot easier.

Once the bottom hose is connected, the rest is easy. This photo shows that the thermostat has been installed onto the engine with the bottom and top hoses attached.
Reinstall the temperature sensor connector, and tie down the wiring which was cut loose when removing the old thermostat.

Now, close all drain plugs and bleeding valves.
The manual says to use 50/50 mixture of long-life ethylene glycol antifreeze and water. I got 100% antifreeze. For the water part, I filled with bottled water. I figure if it's good enough for me, it's good enough for the car.

Lower the car to the ground. Drive some and recheck the coolant level (after the coolant has cooled down, of course). My Check-Engine light came back on once again but went away afterwards and has never returned.

Nice writeup and excellent pics. I need to do this same thing, and I'm not paying the stealership to do it.
ReplyDeleteThanks for this excellent write up, I just ordered all the parts to do the same on my '05 X3 ! God Bless you !
ReplyDeleteFantastic Write up!!! Can you comment on the jack stand points and floor jack. Did you need special adapters for the jack stands/floor jack?
ReplyDeleteCheers!
Hey, nice writeup, but DO NOT USE DRINKING WATER! You must use distilled water to dilute the antifreeze because tap water and bottled drinking water contain minerals and other elements that are bad for the (aluminum) cooling system. Tap/drinking water can be used only in emergencies and should be thoroughly drained and replaced with distilled water + antifreeze as soon as possible.
ReplyDeleteAbsolute rubbish, you do not need to use distilled water, in fact it's purified state means it 'pulls out' metals from the engine etc! Tap water is fine & only that should be used with afrz.
ReplyDeleteMechanic Servicing Perth, Accredited Log Book Service. Audi, BMW, Mercedes Benz, Mini, Porsche & VW Specialists. Servicing German cars in Perth since 1999
ReplyDeleteaudi repair
Hi Dear,
ReplyDeleteI Like Your Blog Very Much. I see Daily Your Blog, is A Very Useful For me.
You can also Find startmotor bmwStartmotor BMW kwaliteit online goedkoop kopen, BMW Startmotor snel verzonden en in huis - Auto-onderdelen in Nederland en België
Visit Now:- https://my-parts.nl/auto-onderdelen/startmotor/bmw
These are some of the very useful tips given. A furnace must be maintained overtime.
ReplyDeletehttp://www.cosmopolitanmechanical.ca/